How to photograph holiday lights and bokeh

Holiday lights look magical to the eye but can turn into bright blobs on a dark background in photos. Timing, aperture and white balance make the difference. This guide shows when to shoot, how to create soft bokeh or sharp starbursts and how to keep pictures sharp in low light.
Starting settings (approximate)
1Shoot at blue hour
Just after sunset the sky keeps a deep blue tone that balances the brightness of the lights, so both the decorations and their surroundings show detail. An hour later the sky turns black, and the contrast between bulbs and darkness becomes extreme.
Blue hour is short, roughly 20–40 minutes depending on latitude and season (approximate), so plan your first frames before it starts.
- Arrive before sunset to choose your spot and set up.
- Shoot about 15–30 minutes after sunset (approximate).
- Check the histogram and highlight warning; small blown bulbs are fine, large white blobs are not.
2Create soft bokeh
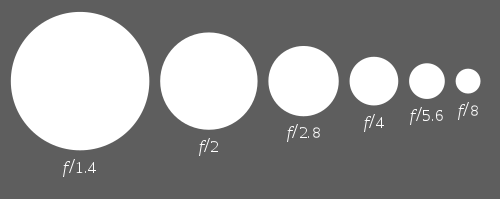
Out-of-focus point lights turn into soft discs called bokeh. The discs grow larger with a wider aperture, a longer focal length and a greater distance between your subject and the lights behind it.
Their shape follows the aperture: wide open they are usually round, while stopping down can make them polygonal.

- Use the widest aperture you have, for example f/1.8–f/2.8.
- Place your subject close to you and the lights well behind it.
- Focus on the subject, or turn to manual focus and defocus completely for an abstract frame of light circles.
- A short telephoto, around 85 mm or longer, makes the discs bigger.
3Or make starbursts
Small apertures turn bright points into star shapes. The number of rays depends on the aperture blades: an even number of blades gives the same number of rays, an odd number gives twice as many.
Because small apertures let in little light, exposures get long, so a tripod is usually needed.
- Use about f/11–f/16 on a tripod (approximate).
- Use a 2-second timer or a remote release.
- Lower ISO to 100–400 for clean shadows.
4Keep handheld shots sharp
Lights at night mean slow shutter speeds or high ISO. A slightly noisy sharp photo usually looks better than a clean blurred one.
Stabilisation lets you go slower for still scenes, but people walking past will still blur.
- Turn on stabilisation and brace yourself against a wall or railing.
- Raise ISO to around 800–3200 as needed (approximate).
- Shoot short bursts and keep the sharpest frame.
- Use a tripod where it is allowed and safe for others.
5Get the colours right
Warm filament bulbs, cool LEDs and street lights all have different colours. Auto white balance may cool down a scene that should feel warm, or leave mixed lights looking odd.
- Try the tungsten preset or about 3000–3500 K for warm bulbs (approximate).
- Try auto white balance as a comparison.
- Shoot raw so you can fine-tune the balance later.
Before you shoot
- Arrive before blue hour
- Wide-aperture lens ready
- Tripod if allowed
- Stabilisation on handheld
- White balance chosen
- Highlights checked