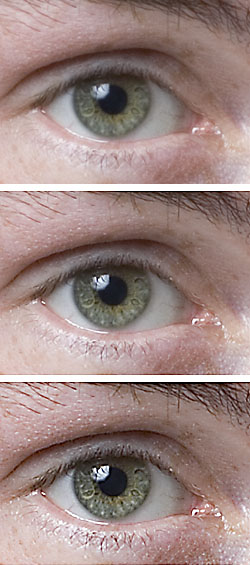
Noise reduction
Noise is random grain and colour speckle, strongest in dark areas and at high ISO. Colour noise reduction removes coloured blotches and can usually be applied fairly strongly. Luminance noise reduction smooths grain but also erases fine detail, so use it moderately. Exposing well in camera reduces noise more than any slider.

In short
- Luminance noise is grain; colour noise is coloured speckle.
- Colour noise reduction is cheap in detail; luminance noise reduction is not.
- Too much smoothing makes a plastic, painted look.
- Collecting more light at capture beats fixing noise later.
Where noise comes from
Digital noise is random variation in pixel values. Most of it comes from the natural randomness of light itself (photon shot noise) and from the sensor electronics. It is most visible where little light was collected: shadows, night scenes and small sensors.
Raising ISO amplifies the signal and the noise together. The real cause of a noisy image is usually too little light, not the ISO number itself. Long exposures and warm sensors also add noise, such as hot pixels.
Luminance and colour noise
Luminance noise appears as grain: tiny variations in brightness, similar to film grain. It can look acceptable or even pleasant in small amounts.
Colour, or chroma, noise appears as red, green and blue speckles and blotches, especially in dark, smooth areas. It almost always looks bad and is the first thing to clean up.
Using the sliders
Colour noise reduction can usually be raised until the speckles vanish, since our eyes see detail mainly through brightness rather than colour. Too much can bleed colours at small edges, so check fine colourful details.
Luminance noise reduction smooths grain but also removes fine texture. Raise it slowly while viewing at 100% and stop when the grain is acceptable, not gone. Detail and contrast controls, if present, help keep edges.
Newer editors offer learning-based noise reduction that keeps more detail. It is slower and can invent texture, so inspect faces, text and patterns closely.
The detail trade-off
Every noise reduction method trades grain for softness. Overdone, skin looks waxy, foliage turns to mush and skies get blotchy patches. A little remaining grain often looks more natural than an over-smoothed image.
Judge for the output. Grain visible at 100% may be invisible in a small web image or a print viewed from normal distance.
Order with sharpening and exposure
Apply noise reduction before or together with sharpening, and use a sharpening mask so smooth areas are not re-roughened. Large exposure or shadow lifts reveal more noise, so set tones first, then reduce noise.
Local noise reduction, painted onto skies or shadows only, keeps detail where it matters.
Shooting to avoid noise
Expose generously: a brighter capture, short of clipping important highlights, gives cleaner shadows than lifting a dark frame later. Use a wider aperture, a slower shutter speed with a tripod or added light before raising ISO.
Shoot raw for more control. For still subjects, stacking several frames and averaging them reduces noise considerably. Long-exposure noise reduction in camera, if available, subtracts hot pixels using a dark frame.
Frequently asked questions
What ISO is too high?
It depends on the sensor size and model. A noisy picture at a given ISO usually means not enough light; check results from your own camera to find your limit.
Should I remove all noise?
No. Remove colour noise fully but leave some fine grain. Removing all luminance noise usually costs too much detail.
Is learning-based noise reduction better?
It often keeps more detail, but can create unnatural textures. Check faces and fine patterns at 100% before using the result.
Does noise reduction work on JPEGs?
Yes, but less well, since the camera already processed the noise. Raw files give cleaner, more controllable results.