Sharpening photos
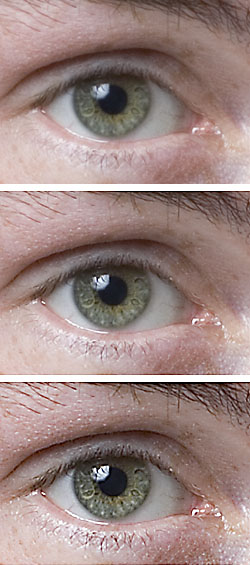
Sharpening increases contrast along edges so detail looks crisper. Amount sets the strength, radius sets how wide the edge effect is, and masking limits it to edges rather than smooth areas. Sharpen lightly while editing and again for the final screen or print size. Too much creates bright halos and gritty noise.
In short
- Sharpening adds edge contrast; it cannot fix missed focus or motion blur.
- Small radius for fine detail, larger radius for coarser structure.
- Masking protects skies and skin from extra noise.
- Sharpen for output last, at the final size, and view at 100%.
What sharpening really does
Sharpening does not add detail. It raises contrast where light and dark meet, which makes edges look crisper. The classic method is unsharp masking: a blurred copy is subtracted from the image to find edges, which are then emphasised.
Every digital image needs some sharpening because sensors, anti-aliasing filters and demosaicing soften fine detail slightly. Raw files arrive soft; in-camera JPEGs are already sharpened.
Amount, radius and detail
Amount controls strength: how much brighter or darker the edges become. Radius controls how wide the effect spreads from each edge, in pixels. A small radius, around 0.5–1 pixel (approximate), suits fine textures such as hair or foliage; a larger one suits soft, larger shapes.
Some editors also have a detail or threshold control. It decides how small a contrast difference counts as an edge, so higher detail sharpens fine texture and noise together, while a threshold skips subtle variations.
Masking
A sharpening mask limits the effect to strong edges and leaves smooth areas alone. It is valuable for skies, skin and out-of-focus backgrounds, where sharpening mostly makes noise visible.
Many editors let you hold a key while dragging the mask slider to preview it in black and white: white areas get sharpened, black areas do not.
Capture, creative and output sharpening
It helps to think in three stages. Capture sharpening restores the slight softness of the sensor and is applied gently to the whole image. Creative sharpening is local, for example on eyes or a key detail.
Output sharpening is applied last, for the final size and medium. Images shrunk for the web often need a little more after resizing. Prints usually need more than looks right on screen, because ink spreads on paper and viewing distance is greater, and matte paper needs more than glossy (rule of thumb).
Halos and other artefacts
Over-sharpening creates bright or dark outlines along edges, called halos, which are especially visible against skies. It also roughens skin and turns noise into grit.
Check at 100% view, then step back to normal size. If edges glow or textures look crunchy, reduce amount or radius. Halos are a form of ringing artefact in image processing.
What sharpening cannot fix
Missed focus, camera shake and subject motion blur are not fixed by ordinary sharpening. Deblurring tools can help a little, but results vary and may look artificial.
The best fix is in the field: a fast enough shutter speed, accurate focus, a stable stance or a tripod, and a good aperture for the lens.
Frequently asked questions
How much should I sharpen?
Less than you think. Increase amount until edges look crisp at 100%, then back off slightly. The right value depends on the camera, lens and subject.
Should I sharpen before or after resizing?
Do light capture sharpening on the full image, then apply output sharpening after resizing to the final size.
Why does sharpening make my photo noisy?
Noise is fine-grain contrast, so sharpening boosts it too. Use masking and apply noise reduction before sharpening.
Can sharpening save a blurry photo?
Only slightly soft photos. A clearly out-of-focus or motion-blurred photo cannot be made genuinely sharp.